It seems like a common enough thing to want to do – set a GPIO pin high or low at boot.
The first thing you will need to do is find the name of the GPIO pin you want to set. The Pinmux table may help with this.
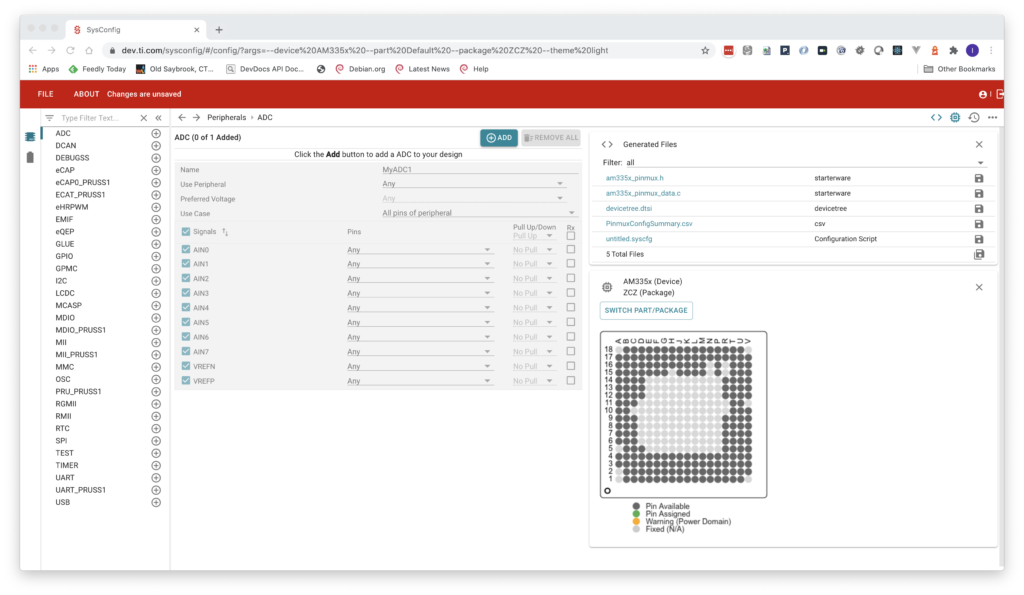
Having found your GPIO name, the next tool that is useful is the TI Sysconfig at https://dev.ti.com/sysconfig – you will have to create a free account to use it.
This tool makes it easier to find the correct pinmux for your device tree source file.

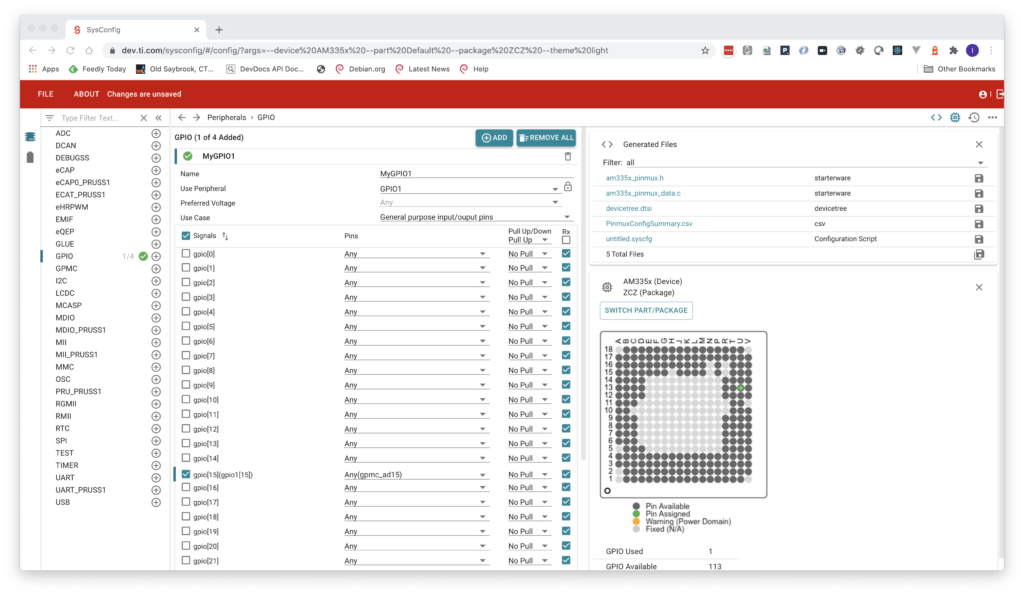
Add the GPIO controller you need and then select the pin

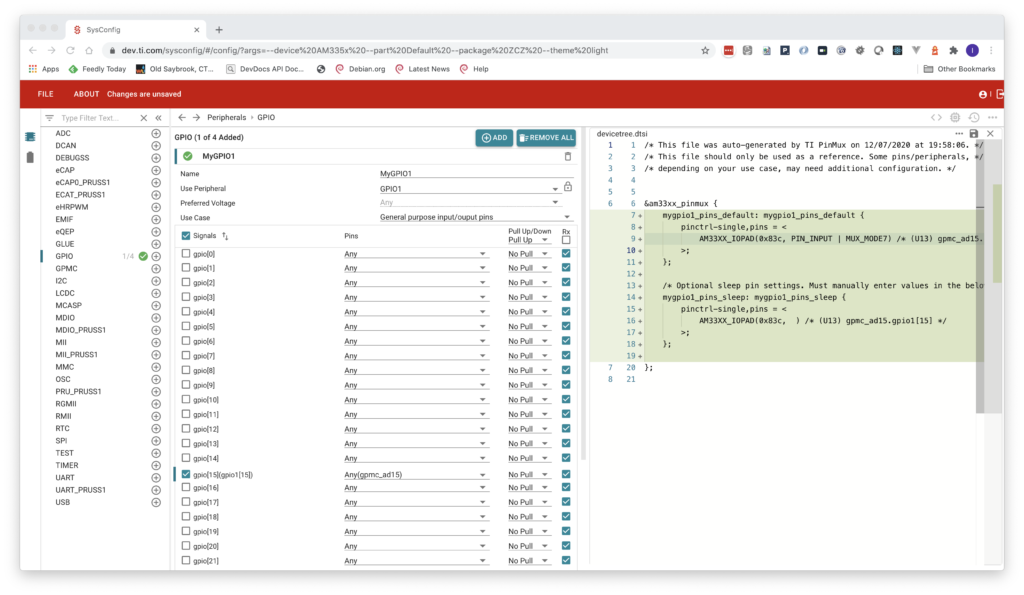
Once you have selected all the pins, their direction (input or output) and pull-up or pull-down, you can find the device tree entries by clicking on the devicetree.dtsi link in the top right pane.

This will give you the pinmux settings you need, such as:
AM33XX_IOPAD(0x83c, PIN_INPUT| MUX_MODE7) /* (U13) gpmc_ad15.gpio1[15] */
You can add the pinmux settings to the &am33xx_pinmux section of your device tree, giving them a label that you can use elsewhere.
&am33xx_pinmux {

        ui_button_pins: ui_button_pins {
        pinctrl-single,pins = <
            AM33XX_IOPAD(0x83c, PIN_INPUT| MUX_MODE7) /* (U13) gpmc_ad15.gpio1[15] */
        >;
    };
};
Depending on what version of kernel you are using, you can either add the GPIO to the &ocp (old versions, e.g. 4.19) or the top level (newer kernels, e.g. 5.4 which don’t use the OCP – On Chip Peripheral section)
New Kernels
/{
    model = "Test Design";    compatible = "oct,osd3358-sm-refdesign", "ti,am335x-bone-black", "ti,am335x-bone", "ti,am33xx";
    chosen {
        stdout-path = &uart0;
    };

    ui_button {
        compatible = "gpio-keys";
        pinctrl-names = "default";
        pinctrl-0 = <&ui_button_pins>;
        status = "okay";
    };
};
Old Kernel
&ocp {
    ui_button {
        compatible = "gpio-keys";
        pinctrl-names = "default";
        pinctrl-0 = <&ui_button_pins>;
        status = "okay";
    };
};
You should now be able to compile your device tree and install it on your device.
If you need to build you device tree stand alone, you can use Robert C Nelson’s DTB Rebuilder repository, located at https://github.com/RobertCNelson/dtb-rebuilder